Oven - How to replace the heating element
Risinājums

Refer always to your product’s user manual safety information before any repair or maintenance operation. https://www.electrolux.com/support/user-manuals/

WARNING! RISK OF ELECTRIC SHOCK
Before any repair or maintenance operation, deactivate the appliance and disconnect the mains plug from the socket.
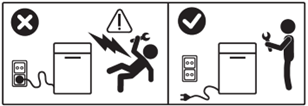
WARNING! RISK OF INJURY

Always take care when moving appliances. For heavy appliances it's safest for two persons to move it. Always use safety gloves and safety footwear. Wear safety gloves at all times to protect from cuts from sharp edges.
WARNING! RISK OF EYE INJURY

Wear safety glasses if you perform maintenance or repair work involving springs.
WARNING! RISK OF BURNS
Before any repair or maintenance operation make sure the appliance is not hot.

WARNING! CHOKING HAZARD
Small parts not for children under 3 years. Keep all small parts and packaging out of reach of children.
Only adults should use or install the product.
Make sure to use the product only for its designated purpose and verify that it is a compatible part for the intended product.
Do not use or install the product if damaged.
Please note that self-repair or nonprofessional repair can have safety consequences if not done properly and might void the warranty. Possessing the necessary know-how is essential.
HOW TO REPLACE HEATING ELEMENT, LOWER
1. Unscrew the three Torx 20 screws at the top of the back panel and then pull towards you and up to release the back panel.

2. Note: When reinstalling back panel ensure that the bottom tabs are hooking back into the base panel on the bottom of the oven.

3. Carefully disconnect wiring connectors from the lower heating element spade. (Note: Take a photo of the wiring positioning/location before disconnecting) Be careful not to damage the connectors.

4. Gently move some insulation to expose the two retaining tabs for the bottom element holder. Note: Be careful to tear the insulation.

5. Use a small flat bladed screwdriver to unhook and drop the retaining clips for the bottom element.

6. Bend down the retaining clips to expose the lower heating element.

7. Bend down the retaining clip in the centre of the base element. Note: On some models there will be a Torx 20 screw in the middle of the element to hold which also needs to be removed.

8. Note: At this stage if you are not working on a oven that has a base steam generator you will be able to pull the lower element out to remove from the body of the appliance.

9. Push down the securing tab on either side of the front door hinge.

10. Slide the door off the hinges and remove the internal steam plate cover.

11. With help from a second person, lift the appliance onto it’s top. Note: Ensure that the water tank is empty and it is recommended to use a towel to place the appliance on to catch any residual water.

12. Unscrew the three Torx 20 screws on either side of the base plate of the oven. Carefully pull back the retaining hooks on either side on the rear of the appliance base plate.

13. Gently move some of insulation to expose the steam generator.
Note: Be careful to tear the insulation.
Carefully disconnect the four wiring connectors from steam generator spades and unscrew the two 7mm nuts to release the earth and neutral cables. (Note: Take a photo of the wiring positioning/location before disconnecting) Be careful not to damage the connectors.

14. Release the jubilee clip that holders the steam generator pipe to the steam generator.

15. Unscrew the twelve 7mm nuts around the circumference of the steam generator and remove the three metal support plates around the edge of the steam generator.

16. Note: Ensure you are supporting the base of the steam generator whilst unscrewing the top.

17. Carefully lift down and remove the steam generator and pipe.
Note: Be careful not to damage the gasket for the steam generator, ensure that the gasket is correctly fitted during reinstallation.

18. You will now be able to slide out the lower base element from the back of the appliance.

19. When reassembling, repeat steps in reverse order.
Vai šis raksts bija noderīgs?
Saistītie raksti
- Cepeškrāsns – kā nomainīt ventilatora motoru (2)
- “Gas-on-glass” plītis – kā nomainīt degļa vāciņu
- Kā nomainīt cepeškrāsns sānu lampu
- How to replace radiant heater
- Kā nomainīt durvju slēdzeni
- How to replace glass cooking top with control knob
- Kā nomainīt augšējo sildīšanas elementu (2)
- Kā nomainīt stikla virsmu plīts virsmai (2)
- Kā nomainīt dzesēšanas ventilatoru
- Kā nomainīt blīvslēgu vāku